
Blisters on Trek:
Prevention, Treatment, and Expert Advice
Prevention, Treatment, and Expert Advice
How to prevent and deal with blisters on trekking adventures, by the professionals of Blisterhelp. A simple blister can quickly become infected and force you to stop your adventure.
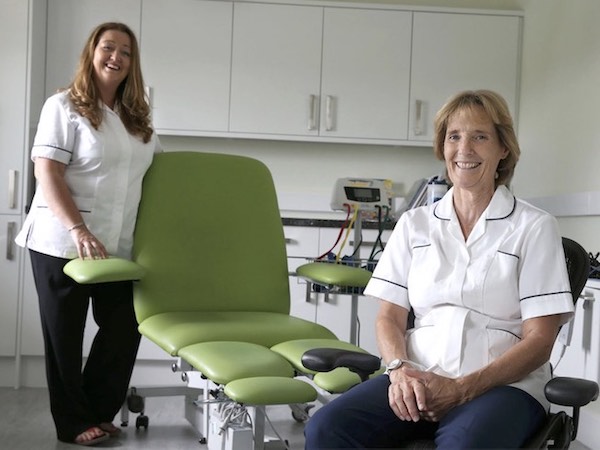
Blisterhelp – the ladies behind the Service
This article has been kindly written by Lindsey Ebbs, who together with Suzanne Bedford are the footcare professionals of Blisterhelp.
These ladies both have degrees in Podiatry, over 20 years of experience each, and offer a wide range of services as well as blister kits to solve any issue.
If you’ve ever had an issue with blisters, keen to prevent them, or generally curious then take the time to read this article.
What Causes Blisters on Trekking Adventures?
Travel and Trek’s guides are there to provide medical support if needed, but no one wants their once-in-a-lifetime adventure to end by being forced to stop due to blisters. At Bisterhelp, we are here to provide you with the preparation, knowledge, and kit you need to ensure you won’t have to call a stop due to blisters. The sense of achievement from achieving your goal, blister-free is worth every minute of preparation.
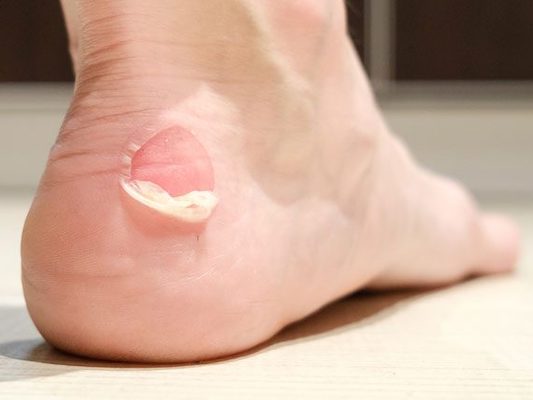
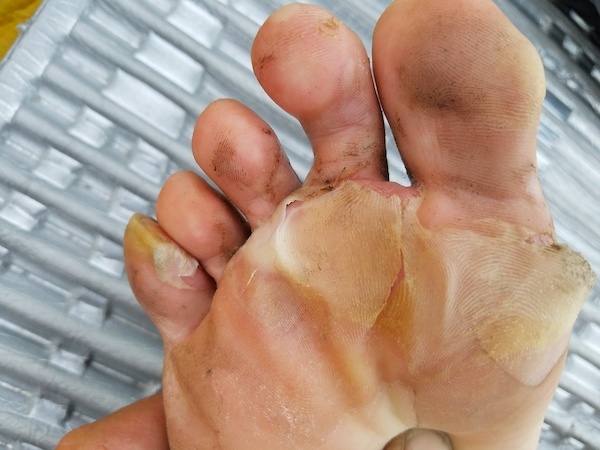
Blisters are caused by a combination of external elements: stress, moisture, friction, and heat.
The places you can explore with Travel and Trek are incredible, often remote wilderness locations such as the Sahara, the Arctic, and mountain treks. This is why you will need to have medical supplies on hand if you feel a blister developing. We are podiatrists based in Yorkshire with a (some say- odd) interest in blisters Blister Help | When Stopping is not an option. We hate that blisters can end the fun, so we share our skills and sell Blister kits filled with tried and tested products to enable you to complete whatever challenge you take on.
Go straight to how to pop a blister.

How To Prevent Blisters
In the Mountains
- Footwear – Make sure the fit of the boot is correct. They are wide enough for the widest part of the foot to feel comfortable and no areas feel tight, measure a thumbs width at the tip of the toes to the end of the boot, this allows enough room for the toes without causing pressure from the footwear onto the tips of the toes. Depth of the boot allowing enough room from the top of the boot especially for those toes that are retracted and a bit curly. Make sure the boots have been well worn prior to the climb, so the foot has already had time to adjust to the boots. Check they are still waterproof before the expedition. Best Footwear For Blisters | Blisterhelp
- Lace locking – This makes sure the foot doesn’t move around in the boot which can cause blisters. It ensures the ankle is kept in position and the laces can be laced loosely further down the shoe and going up the legs area but locked at the ankle. A lot of boots now have that facility already built into the boot. Lace locking is a simple measure that makes a huge difference to blister prevention.
- Gaiters – In snowy, extreme conditions gaiters are needed to prevent water getting into the inside of the boots, if moisture does get into the boot, the skin becomes wet and will blister. Gaiters need to be long enough to protect the leg and foot and flexible to be comfortable but also waterproof from the harsh environmental conditions.
- Socks – All socks need to be moisture wicking, so that the sweat will move away from the skin. Even in a cold environment the body will sweat with exertion, coolmax and merino wool are perfect materials to do that. A lot of people like to wear two socks so that the friction is taken up between the socks and not the skin. Liners are perfect for that situation as long as they have wicking materials present. Some socks are cushioned underneath the foot which helps in preventing blisters underneath the foot, whilst giving the balls of the feet a little extra much cushioning.
- Conditioning – means preparing the body for a major event, training in the best way you can, not only to improve your fitness levels but conditioning the skin of the feet to expect the forces that are going to be imposed on them, they are less likely to blister when enduring the real thing.
- Skin – the quality of the skin needs to be at its optimum before starting the climb. This is achieved by removing hard skin, corns or calluses. A trip to the podiatrist is required to sort that out. Now the skin is smooth and soft then continue to make sure the skin is moisturised and kept soft, not hard and dry. When the skin is at its optimum condition, it flexes and moves and is less likely to blister. Blister prevention | Blisterhelp
- Silica sachets – mostly found in parcels and packaging and they stop any moisture getting into the products being sold. Collect and keep them in a sealed jar and when you start your climb put your damp socks in a sealed zip lock bag with the silica sachets at the end of the day and they will absorb the moisture, keeping your socks as dry as possible and preventing damp skin which as we know, will blister.
For the Desert
Ask yourself these questions to make sure you are prepared:
- How often have you walked in the desert and is your local environment similar to a desert? the answer is likely to be no…. most of us live in a moderate climate with seasonal changes.
- What type of footwear are you going to take with you?
- Is your body used to the mileage that you will be covering on your trip?
- What kind of problems have you anticipated that will happen on your adventure and does your first-aid kit reflect that?


A desert environment will usually be hot during the day and often cool at a night. The trekking is done during the day unless conditions (extreme heat) dictate that cooler conditions are required, in which case the hours are adjusted to avoid the heat of the day. At the very least, you need to condition yourself to cover the distance you will be expected to do each day. This conditioning is important in reducing injuries and blisters on the feet.
Heat does not actually cause a blister unless you burn yourself but that is a slightly different scenario. As a consequence of the heat, the body does sweat (which is normal) but it is this moisture that is one of the known causes of blisters. Sock wearers need to make sure the socks are moisture-wicking. Merino wool and COOLMAX are both great sock materials to ensure that moisture wicks away from the skin.
In a hot desert environment, feet will swell in size during the day which can be a problem for the footwear that you are wearing. Allowing generous width, length, and depth in your footwear will help prevent the pressure that footwear can put on to the feet and therefore cause blisters by pressure (video on foot sizing). By lace locking correctly the extra room in the shoe won’t be an issue.
Sand grains are such small particles and can easily get down into the sock and footwear. This causes an irritation next to the skin causing blisters. A lot of the desert extreme event participants often wear gaiters, but ordinary gaiters are not effective because of the size of the sand grains. Check out the high-quality ripstop nylon (parachute silk) gaiters from Sandbaggers. They claim to offer 100% protection from the sand. They are made from high-quality ripstop nylon (parachute silk).
Going barefoot or wearing sandals can be an option, if you are confident that the sandals will allow the sand to run through them and not stick to your feet and going barefoot is okay if you are used to that and the sand isn’t at too high a temperature to actually burn your feet? 2Toms blister shield is a great product to apply to the feet if you are thinking of wearing sandals as it will reduce the amount of friction applied to the skin
So, what if you haven’t managed to prevent blisters, you’ve now got one and you’re not sure how to treat them? Blisters can be treated in many ways depending on the stage that the blister is in?
What is your next day plan? For eg; if you are on the last day of your adventure then the treatment plan will be slightly different from your first day. On our website, there is a comprehensive treatment plan for how to treat blisters for each stage that the blister may be in on what dressings that you really need to be using as these will differ to the stage of blister presenting.
The only difference being in the desert is the heat and sweat, this can often be quite challenging for normal dressings which will not be able to stick to the skin.
I would always recommend using a product called Skin-Tac, which is a skin preparation product. It is almost like skin glue and it helps the dressings to stay on longer and are less likely to peel off and a rucked dressing can also cause a blister. Skin-Tac is an amazing product, but it needs to be treated with care as it can cause your fingers to stick to themselves so wearing gloves and disposing of them is essential. Any exposed skin that has skin tac on can also cause a blister, so please make sure all the areas of skin are coved by the dressing or tape. Tac- Away wipes will remove the residue of skin tac on the skin before the foot is redressed.
We hope you have the best time exploring and your feet stay healthy!
The rigours of the Sahara Desert are waiting, or try the iconic Everest Base Camp, or Kilimanjaro treks.
For a full list of our trekking, cycling and Arctic adventures, go to Travel and Trek’s Home Page.
How and When to Pop a Blister
Picture this- you’ve planned, trained, and invested in a ‘once-in-a-lifetime’ adventure with Travel and Trek, maybe you’re halfway to Everest Base Camp or in the depths of the Sahara and you get a blister. It doesn’t sound too dramatic, does it? We’ve spoken with Terry, Director of Travel and Trek and he has been in exactly this situation with clients and it can be a game-changing moment. Some clients have had to abandon the expedition completely as a blister can change very quickly from a sore patch to an excruciatingly painful, possibly infected medical problem.
This is why it is vital to have good quality, sterile equipment with you. A blister can strike at any time but to reduce the likelihood, preparation is key, so make sure you check out our previous article with lots of advice, to help you prepare your feet for the trip.
Back to you, up a mountain, boot and sock off realising you have a blister. . . ideally, leaving the blister intact is the best option but sometimes the pressure is too uncomfortable, and popping it is the best course of action, follow our steps below to pop and then dress your blister in the safest way.
Firstly, where is the blister located on your foot? If it is under a toenail, these are really painful and cause problems to the toenail later if left, so scroll ahead to the second section.
When you are mid adventure and have a blister forming on one side of the foot you will compensate for the pain by changing the way you walk, which increases the chance of blister forming on the opposite side of your foot.
I know popping the skin with a sterile needle or a scalpel is a bit scary but it isn’t painful at all in fact the relief is instant especially with the blisters under the nail.
This is How you Pop a Blister
Here’s the video link. (1) How to pop a blister – YouTube
- Have the right equipment laid out in front of you
- Prep the skin with alcohol wipes
- Wearing gloves, use a sterile needle/scalpel blade to puncture the blister in two places, large enough for the hole not to close up again, absorb the fluid released with sterile non-woven gauze.
- Wipe the popped blister with saline wipes and apply povidone-iodine swabs onto the blister (Tisept liquid sachets if sensitive to iodine)
- Apply a sterile Island dressing to the blister.
- Apply 2Toms Blister shield to the dressing afterward to reduce the friction to this area if continuing on an activity.
- Apply deflective padding to reduce ongoing shear to that area of the foot.
- Dressings can be kept on the skin, clean, and dry for up to a week, this will allow for optimum healing.
This is How you Pop a Blister Under the Toenail
Here’s the video link (1) How to pop a blister under a toenail – YouTube
- Prepare the skin with an alcohol wipe, ensuring the skin is clean prior to popping
- Wearing gloves, pierce the blister under the nail at the top of the toe with the needle or scalpel and drain the fluid into the sterile non-woven gauze.
- If the blister is near the base of the nail, then you might need to pop the blister through the nail by entering from the top of the nail and using a sterile needle, gently but firmly turning the needle into the nail plate until it reaches the blister which is released into the sterile non -woven gauze.
- Wipe the popped blister with saline wipes and apply povidone iodine swabs onto the blister (Tisept sachets if sensitive to iodine)
- Apply a sterile Island dressing to the blister.
- Apply 2Toms Blister shield to the dressing afterwards to reduce the friction to this area if continuing on an activity.
- Dressings can be kept on the skin, clean and dry for up to a week, this will allow for optimum healing.
If your blister develops, the roof gets torn, comes off completely or your skin gets macerated then please make use of our other videos, guiding you through blister treatment at all stages and locations on the foot. (1) Blisterhelp – YouTube
We are keeping our fingers crossed that you get through your adventure blister free, if you do now get blisters then you will know the best treatment techniques to enable you to complete the challenge.


