
TREK MOUNT KENYA
MOUNT KENYA
TREK
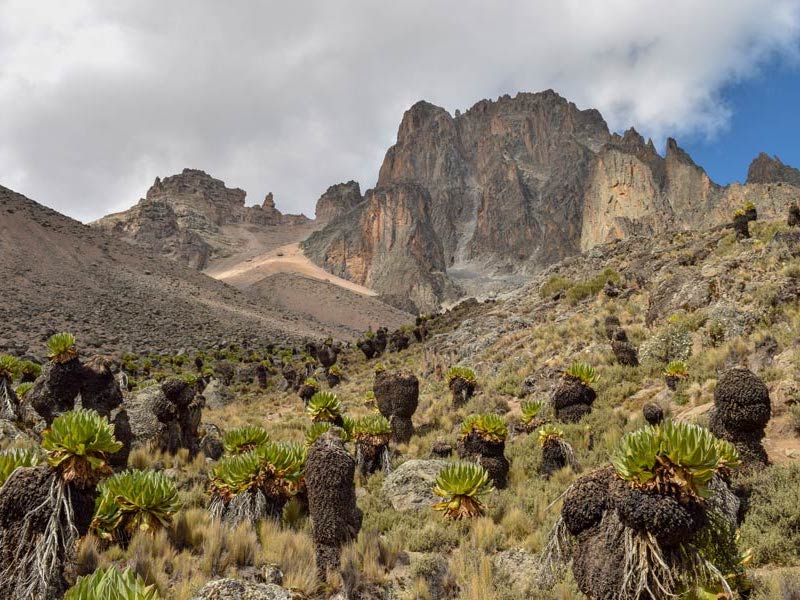
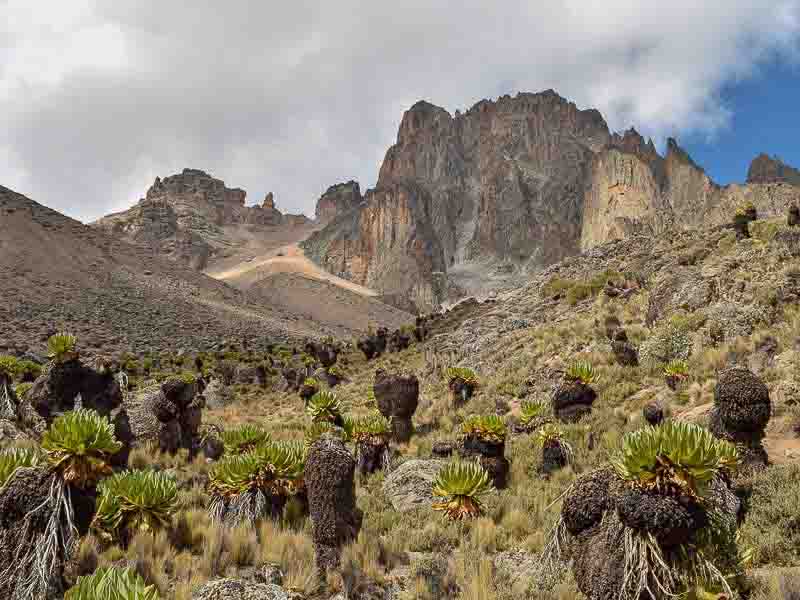
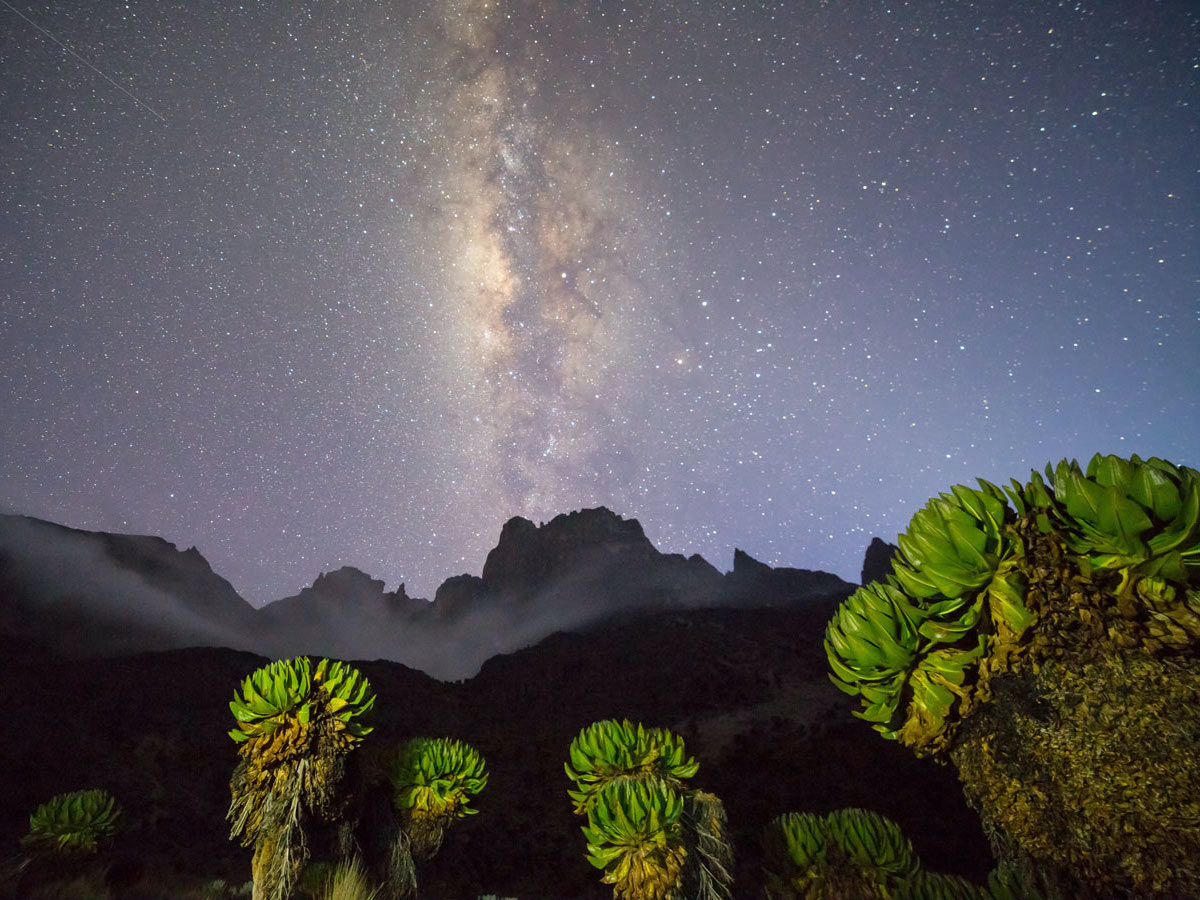
Great view of the
Mount Kenya Peaks.

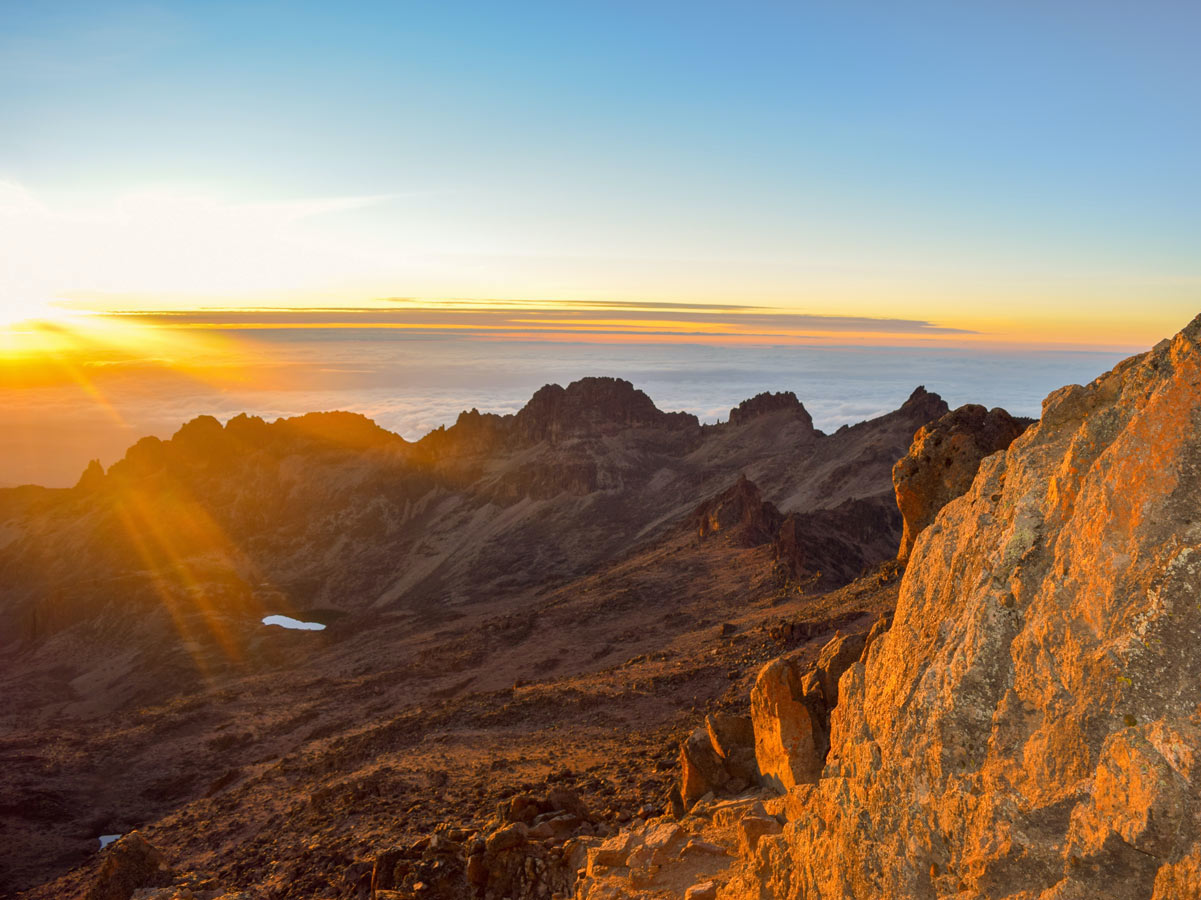
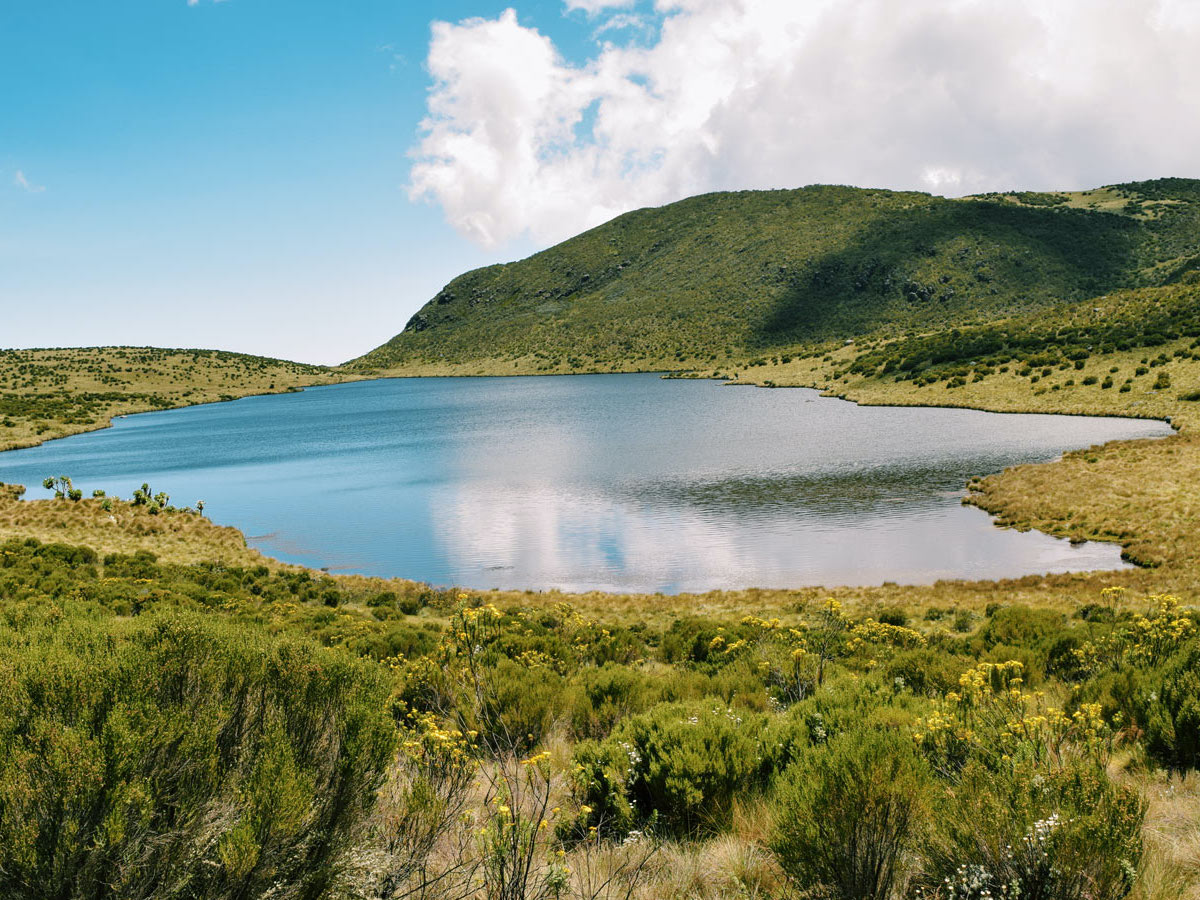
Lake Ellis, way above the
fluffy clouds on the
Mount Kenya trek.

Some flat ground for a campsite
amongst the unusual landscape,
in the shadow of Mount Kenya.
This Trip
- 8 days/6 trekking days
- Max altitude 4985m
- Min group size – 2
- 2 nights hotel/1 night cabin
- 4 nights tented on trek
- All meals/water on trek
- Full guide/porter support
- Airport – airport transfers
Land Only Price from £1550
This Challenge trip/challenge is available as a Charity Challenge. Click here to see the charity fundraising options.
This Challenge trip/challenge is available
as a Charity Challenge.
Click for the charity fundraising options.
Mount Kenya Trek – Stunning Landscape
This Mount Kenya trek summits Point Lenana (4985m/16,354′), one of 3 peaks that make up Mount Kenya. It is the 2nd highest trekking peak in Africa (after Kilimanjaro) and is a UNESCO Biosphere Reserve due to its stunning landscape.
- Breathtaking views across the Kenyan Plains
- Just 69 miles from the equator
- Beautiful terrain, very few people
After a safe overnight stay in Nairobi, this journey heads out to the Mount Kenya area to begin the trek. It takes you through the fascinating world of mountain wilderness, abundant wildlife, and mountain lakes, with Mount Kenya’s jagged, icy summit in sight from the very first day of the trek. And with far fewer visitors, the trails are less worn, and you can experience moments where you feel you are the only person in this beautiful African mountain wilderness. An early morning ascent of Mount Kenya’s Point Lenana allows you to experience the breathtaking views across the Kenyan Plains.
Although Point Lenana is agonisingly short of the 5000m mark (just 15 metres), its lofty position compared to all that is around it offers superband expansive views. The descent from Mount Kenya is quick so any altitude-related issues are quickly resolved.
Mount Kenya is just 69 miles from the Equator and is both a Unesco World Heritage Site and a Unesco Biosphere Reserve. Being this close to the Equator, the sun sets and rises at the same time every day with only 1 minute difference between the shortest and longest day in the year.
How about combining Mount Kenya with Kilimanjaro and, or Mt Meru. Call us on 07725 943108, or use this form to discuss.
Mount Kenya – Brief Itinerary
Day 1 – Arrive Nairobi late evening, transfer to hotel
Day 2 – Drive Nairobi to Chogoria Bandas, 4 – 5 hrs (2950m)
Day 3 – Trek Chogoria Bandas to Lake Ellis, 4 – 5 hrs (3450m)
Day 4 – Acclimatisation Day Lake Ellis
Day 5 – Lake Ellis to Lake Michaelson (4000m), 6 hrs
Day 6 – Lake Michaelson to Simba Tarn (4600m), 3 – 4 hrs
Day 7 – Simba Tarn to Point Lenana (4985m), descend to Moses Camp 7 – 10 hrs, transfer to Nanyuki 1 hr
Day 8 – Drive Nanyuki to Nairobi, spare time before evening departure
What the price includes
- Return airport transfers
- Private road transfers as stated in the itinerary
- AMREF membership during the trek (medical air rescue service to Nairobi*)
- 1-night hotel accommodation in Nairobi on arrival, twin share B&B
- 1-night hotel accommodation in Nanyuki after the trek, twin share B&B
- 1-night in a cabin and 4 nights camping, both twin share
- All meals as indicated in the itinerary
- Qualified English speaking guide
- Porters, Cook and Server
- Terra Nova Quasar two-man tents and Prolite Plus Thermarest sleeping mattresses
- Porterage
What the price does not include
- International flights
- Kenyan Tourist visa
- Staff tips (Guide, Chef and Servers)
- Personal spending
- Personal travel insurance
- Lunch and evening meal on day 8
- Entry fees on day 8
* This does not replace your travel insurance
| Group Dates | Land Only  | Book |
|---|---|---|
| 6 - 13 Jun 2026 | £1550 | |
| 12 - 19 Sep 2026 | £1550 | |
| 3 - 10 Oct 2026 | £1550 |
Deposit – £350
Single Room Option
– £190. This fee is for sole occupation of a room on nights 1 and 7, and a tent to yourself on nights 3, 4, 5 and 6. Sole occupation is not possible on night 2.
LAND ONLY
We do not offer or sell international flights. We can assist you with advice on the best, most reliable flights for this destination based on our extensive experience in such matters. Our services will commence when we collect you at the destination airport and finish when we drop you back there unless otherwise agreed.
✓ Choose your preferred airline, flight route, seat class, and departure timings/airport to suit you.
✓ Low airfares and deals – you choose when you book your flights.
✓ This trip is a ‘package’, and therefore the Package Travel Regulations 2018 apply.
✓ Financial protection (International Passenger Protection (IPP)) against our insolvency.
Tailor-make your Mt Kenya trip to suit YOU.
Our Mt Kenya trips are guaranteed to depart with a min of 2 people at the advertised price. If you wish to trek solo (with the standard full supporting crew), we can do that but the price will increase, please ask.
You can choose to depart on whatever dates you wish if the advertised dates do not suit you, or join an existing group if one has formed.
You can adjust the itinerary too, to add or reduce days (if possible) to suit your requirements. For example you can add days in Nairobi on arrival, or after the trek.




Mount Kenya Trek
Stunning Landscape
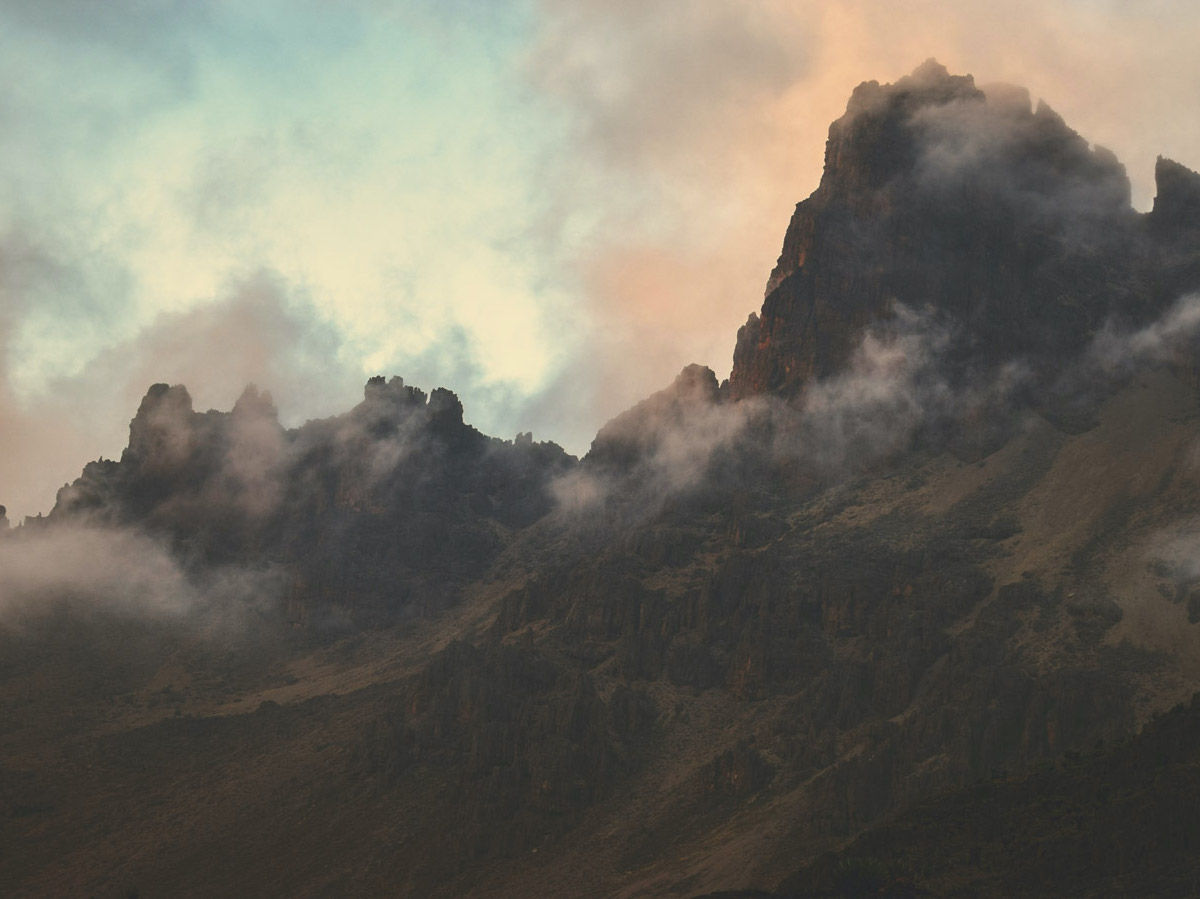
This Mount Kenya trek summits Point Lenana (4985m/16,354′), one of 3 peaks that make up Mount Kenya. It is the 2nd highest trekking peak in Africa (after Kilimanjaro) and is a UNESCO Biosphere Reserve due to its stunning landscape.
- Breathtaking views across the Kenyan Plains
- Just 69 miles from the equator
- Beautiful terrain, very few people
After a safe overnight stay in Nairobi, this journey heads out to the Mount Kenya area to begin the trek. It takes you through the fascinating world of mountain wilderness, abundant wildlife, and mountain lakes, with Mount Kenya’s jagged, icy summit in sight from the very first day of the trek. And with far fewer visitors, the trails are less worn, and you can experience moments where you feel you are the only person in this beautiful African mountain wilderness. An early morning ascent of Mount Kenya’s Point Lenana allows you to experience the breathtaking views across the Kenyan Plains.
Although Point Lenana is agonisingly short of the 5000m mark (just 15 metres), its lofty position compared to all that is around it offers superband expansive views. The descent from Mount Kenya is quick so any altitude-related issues are quickly resolved.
Mount Kenya is just 69 miles from the Equator and is both a Unesco World Heritage Site and a Unesco Biosphere Reserve. Being this close to the Equator, the sun sets and rises at the same time every day with only 1 minute difference between the shortest and longest day in the year.
How about combining Mount Kenya with Kilimanjaro and, or Mt Meru. Call us on 07725 943108, or use this form to discuss.
Itinerary
Mount Kenya – Brief Itinerary
Day 1 – Arrive Nairobi late evening, transfer to hotel
Day 2 – Drive Nairobi to Chogoria Bandas, 4 – 5 hrs (2950m)
Day 3 – Trek Chogoria Bandas to Lake Ellis, 4 – 5 hrs (3450m)
Day 4 – Acclimatisation Day Lake Ellis
Day 5 – Lake Ellis to Lake Michaelson (4000m), 6 hrs
Day 6 – Lake Michaelson to Simba Tarn (4600m), 3 – 4 hrs
Day 7 – Simba Tarn to Point Lenana (4985m), descend to Moses Camp 7 – 10 hrs, transfer to Nanyuki 1 hr
Day 8 – Drive Nanyuki to Nairobi, spare time before evening departure
What the price includes
- Return airport transfers
- Private road transfers as stated in the itinerary
- AMREF membership during the trek (medical air rescue service to Nairobi*)
- 1-night hotel accommodation in Nairobi on arrival, twin share B&B
- 1-night hotel accommodation in Nanyuki after the trek, twin share B&B
- 1-night in a cabin and 4 nights camping, both twin share
- All meals as indicated in the itinerary
- Qualified English speaking guide
- Porters, Cook and Server
- Terra Nova Quasar two-man tents and Prolite Plus Thermarest sleeping mattresses
- Porterage
What the price does not include
- International flights
- Kenyan Tourist visa
- Staff tips (Guide, Chef and Servers)
- Personal spending
- Personal travel insurance
- Lunch and evening meal on day 8
- Entry fees on day 8
* This does not replace your travel insurance
Dates & Prices
| Group Dates | Land Only | Book |
|---|---|---|
| 6 - 13 Jun 2026 | £1550 | |
| 12 - 19 Sep 2026 | £1550 | |
| 3 - 10 Oct 2026 | £1550 |
Deposit – £350
Single Room Option
– £190. This fee is for sole occupation of a room on nights 1 and 7, and a tent to yourself on nights 3, 4, 5 and 6. Sole occupation is not possible on night 2.
LAND ONLY
We do not offer or sell international flights. We can assist you with advice on the best, most reliable flights for this destination based on our extensive experience in such matters. Our services will commence when we collect you at the destination airport and finish when we drop you back there unless otherwise agreed.
✓ Choose your preferred airline, flight route, seat class, and departure timings/airport to suit you.
✓ Low airfares and deals – you choose when you book your flights.
✓ This trip is a ‘package’, and therefore the Package Travel Regulations 2018 apply.
✓ Financial protection (International Passenger Protection (IPP)) against our insolvency.
Tailor-make your Mt Kenya trip to suit YOU.
Our Mt Kenya trips are guaranteed to depart with a min of 2 people at the advertised price. If you wish to trek solo (with the standard full supporting crew), we can do that but the price will increase, please ask.
You can choose to depart on whatever dates you wish if the advertised dates do not suit you, or join an existing group if one has formed.
You can adjust the itinerary too, to add or reduce days (if possible) to suit your requirements. For example you can add days in Nairobi on arrival, or after the trek.

Relevant Information About This Trip
ACCLIMATISATION
Vital on this trek.
We choose the longer routes to ensure
you are ready for the final ascent in safety.
Can I train for high altitude?
EXPOSED TERRAIN
This is a camping trip for 5 days
in what is exposed terrain to the elements.
The weather can change rapidly.
Please ensure you are well equipped for
the worst: cold, wet weather.
MIN GROUP SIZE 2
Customise your dates
Min 2 people and you can go!
That’s overall group size, not per booking
Relevant Information
About This Trip
Acclimatisation
Vital on this trek.
We have more than is
recommended but do ask the question
Can I train for high altitude?
EXPOSED TERRAIN
This is a camping trip for 5 days
in what is exposed terrain to the elements.
The weather can change rapidly.
Please ensure you are well equipped for
the worst: cold, wet weather.
MIN GROUP SIZE 2
Customise your dates
Min 2 people and you can go!
That’s overall group size, not per booking
General Notes
Budget for Clothing and Equipment – The following items may be at the top end of your budget considerations if you are venturing into the wilds. These notes should help you on the way to doing some homework and get what’s right for YOU. Remember, sometimes it’s better to hire than buy and not use again. Read our useful Layer Clothing System article.
Having good waterproof clothing with you if you are heading into exposed terrain for any length of time, I would simply class as essential. Without them, you could be in for a very uncomfortable ride and the word hypothermia immediately comes to mind. Don’t underestimate how quickly that can happen.
They can be expensive and it therefore poses the question of what should you buy – the array of options can be daunting.
Key point – never buy waterproofs without trying them on. The fit, style, feel and design all have a huge impact on whether they feel right for you.
Put simply, you want a jacket that will keep you dry in a sustained downpour. A ‘pacamac’ isn’t going to do this! It needs to be relatively lightweight, compact and (in my view) of ‘shell’ construction. In other words, one without a fixed inner layer such as a fleece. You can always add an inner layer (make sure the shell is big enough to accommodate an inner layer) but make sure it’s not fixed in to start with or it’ll be too warm to trek in. Give yourself the flexibility to change up or down as the weather dictates. Remember, it’s not always cold when it rains.
Until you start trying them on, you won’t get the feel of what you want. The hood, zips, cuffs, pockets, will all be factors as to whether it’s right. So go to the big stores such as Cotswold Outdoors, Go Outdoors, Mountain Warehouse, etc.. where they have plenty of choice and see what’s what.
For a decent quality jacket, you won’t get much change out of £150 but think of it as an investment if the intention is to use it time and time again. Do your homework, keep your eye out for sales or closing down shops or end of the line garments, etc.. and strike. Know your prices for the right jacket.
Good comfortable boots are worth their weight in gold. And they don’t have to be expensive.
Boots tend to be classified in ‘seasons’, which indicates their use suitability. 1 season boots are pure summer use going up to 4 season, which are for winter. Some 3 season and most 4 season boots (if not all) will be of such a construction that they will be suitable also for crampon use. As the rating increases, so too the overall strength and robustness of the boot and this includes both uppers and the sole.
As a ‘one off’, a 2 season, soft skinned, waterproof boot will be adequate for the likes of Everest Base Camp, the Sahara (see below), China and Kilimanjaro and similar treks that remain on well worn tracks. They will probably last a couple of treks as they will take a bit of a battering and after a while you may begin to feel the pebbles underfoot. Over time this can cause sore feet and/or blisters.
A 3 season boot on the other hand is likely to be far sturdier (including the sole) and therefore last a lot longer. If you’re looking for a boot that will last you years, you should seriously look at this level. With some boots like this, you won’t feel a thing underfoot.
If you’re heading for the Sahara, there is a separate information sheet on footwear (see Morocco’s Kit List section).
This is the typical type of boot you’re looking at, with an over the ankle protection. This is another classic case of trying some boots on to get the feel of what they are like and cost etc.. against the usage (a one-off or multiple use).


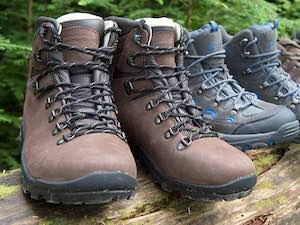

Like boots and sleeping bags, if you are going to use them time and time again, treat them as investments (in you!) and get the best you can. Daypacks need to be comfortable and ‘fit for purpose’.
Read our comprehensive article on how to choose a daypack, what ‘fit for purpose’ means, what to consider (including capacity), and links to the main manufacturers, as well as whether it may be better to hire.
Which one? What temperature rating? Synthetic or down? Buy or hire?
Whatever it is, it’s got to do its job and that is to keep you warm at night. Let’s be clear, sleeping bags do not produce heat, you do. A sleeping bag’s job is to retain your body heat so it’s all about what that bag is made of and its design.
Sleeping bags are measured in temperature ratings these days so look for the ‘comfort rating’ (see below for what this means). Some examples of what you might need:
0°C – Sahara
-5°C – Morocco mountains
-10°C – Kilimanjaro, Nepal, Peru, Bhutan (trekking)
-20°C – Norway arctic challenges
These figures are subjective and you can always wear wooly hats (huge effect) and fleeces inside your bag to help the process.
Pay attention to the ‘fit’. As bizarre as that may sound, bags do come in various lengths and also to fit females (shaped differently). You don’t want a bag to be too snug (claustrophobic) as that warm air you are producing needs to circulate. We all like a bit of wiggle room and it’s useful to be able to store some stuff!
Tip … experienced trekkers will routinely store all sorts of stuff in their sleeping bags overnight (some bags have pockets). Examples are head torches (keep it handy), camera batteries in a bag (prevents deterioration) and socks (warm for the morning)!
Synthetic bags are cheaper, easier to maintain (wash) and more robust when it comes to different conditions. But they are bulkier and heavier.
Down bags are more expensive and need more care (don’t get them wet). But they are lighter, more compact.
Buy or hire? This very much depends on whether your trek is a ‘one off’ or you intend to use it again. You can hire really good, professionally laundered sleeping bags from trek hire companies if you don’t wish to buy something you may not use again. You can buy sleeping bags in Nepal too, good enough for most treks and cheaper than hiring in UK. You can also hire the bags in Nepal, they will be new, not used and washed.
Head for the big stores like Cotswold Outdoors, Go Outdoors, etc… to see for yourself the array of bags and how they feel. Armed with the information you need, start to narrow down your search. Do some homework….
Go Outdoors – sleeping bag guide.
Cotswold Outdoors – sleeping bag guide.
Temperature Ratings – There is a European Standard to be able to compare sleeping bag performances and sleeping bags will have a label inside them:
- Comfort — the temperature at which a standard female can expect to sleep comfortably in a relaxed position.
- Lower Limit — the temperature at which a standard male can sleep for eight hours in a curled position without waking.
- Extreme — the minimum temperature at which a standard female can remain for six hours without risk of death from hypothermia (though frostbite is still possible).
Head torches are extremely useful, almost essential in any environment where no electricity is available such as camping. Essentially, it gives you hands-free lighting to where your eyes go; exactly what you want. Night time reading, sorting stuff out, toilets, you name it, you’ll need a head torch. You can get really good, powerful head torches these days quite cheaply. They often use LED’s so no chance of breaking bulbs.
Make sure it’s comfortable on your head, you know what batteries are used (take spares) and how long they last. Head torches come in a vast array of designs, colours and have varying levels of facilities.
You Cannot Afford To Travel Without Travel Insurance – Simple
Travel insurance should be considered an integral part of your trip costs. Accidents can happen to anyone at any time.
Take a look at some of our personal experience case studies.
TIP! As soon as you book any trip, investigate, decide and buy your travel insurance.
Why? Because even half decent policies will cover you for cancellation of your trip from the date of purchase, not just the period of your cover.
To be adequate, your policy MUST cover you for:
- Medical emergencies including rescue and repatriation to UK.
- All activities you will be undertaking.
Some advice…
- Missed departure – make sure this section covers the cost of a one way flight home. If it doesn’t, consider increasing it, using a policy that does or be prepared to pay the extra!
- Most travel insurance companies use a ‘pay and claim’ system. Carry a credit card with adequate funding capacity for emergencies.
- If you need to claim – call your insurance company immediately (or as soon as possible; don’t delay). They will give you advice. Check phone calls are a claimable cost. Keep all paperwork and receipts related to the claim, take photos if appropriate, videos/images of delayed flight information, etc…you are highly likely to need them to support any claim.
- Purchase your insurance policy as soon as you can after booking a trip. Policies should cover you for cancellation of your trip prior to departure due to injury or illness.
- Travelling more than once in a year? Consider an annual policy; usually cheaper.
- Check policies you may have with banks or building societies; some are not geared for adventure travel.
Here are some companies that some of our previous clients have used before and found their cover to be adequate for their needs. Make sure that you check the policies yourself for what YOU want it for:
True Traveller
Easy site to use, set up by travellers and a good place to start.
Add sections onto the policy, step by step, and see the premium change as you do.
Adventure Pack and Extreme Adventure Pack cover just about anything you need for our trips.
The annual multi-trip policy is excellent value; worth a look if you’re likely to travel twice in a 12 month period.
Insure and Go
Another easy site to use. Different levels of cover with add on’s if you want/need them.
Removing the excess payments looks good value as does the Annual policy verses a single trip if relevant.
We would suggest the Silver cover as a minimum depending on where you’re going.
You don’t have to be a Doctor or medical professional to be well prepared medically for an adventure.
Nothing will spoil your trip more than having health problems. With just a little thought about what might happen and together with knowledge of your own body, it should be sufficient for you to prepare a decent personal First Aid kit.
Quick checklist:
- Adequate travel insurance
- A personal First Aid kit (see below)
- Up to date and appropriate vaccinations for your trip (see below).
- A dental check up prior to travel.
Food hygiene standards in third world countries are less than what you are used to; a change of bowel movement is likely! The question is, to what degree! Travellers’ diarrhoea is very common so be ready for it! Read more about traveller’s diarrhoea.
Vaccinations
Make sure you’re up to date with both the UK citizen childhood NHS vaccination schedule and what you are recommended to have for your destination. Some travel vaccinations can be obtained on the NHS FREE of charge, others will be chargeable.
There are no vaccines for Malaria; tablets. Seek advice as what is prescribed very much depends on where you are going (and in some cases the region of that country). Preventative medicine for Malaria is constantly changing.
The following websites are excellent references to ascertain, or confirm, what is recommended for each country.
Travel Health Pro – All things travel health
Travel Doctor Vaccines (UK)
Personal First Aid Kit
This is a suggested list of what you might consider carrying. It is not exhaustive. Build your own by adapting it to your own wishes/needs.
- Zovirax, cold sores
- Lip balm, preferably sun protective
- Steristrips
- Crepe bandage
- Vaseline
- Safety pins
- Cold/Flu capsules
- Imodium, diarrhoea
- Strepsils or similar, throats
- Ibuprofen, pain inflammation
- Paracetamol, pain killer/headache
- Asprin, sore throat/various
- Dioralyte, dehydration
- Gaviscon, indigestion
- Insect repellent
- Zinc oxide tape, for blisters
- Compede, for blisters
- Melonin Pads for injuries
- Diamox, related to high altitude (see High Altitude tab)
Trekking to high altitudes is hugely rewarding.
But do it responsibly – know the risks, signs and symptoms of AMS
If conducted responsibly, there is absolutely no reason why anyone should not trek safely to destinations such as Everest Base Camp, Kilimanjaro and numerous trekking peaks over 6000m. By responsibly, we mean knowing what to expect, how it will/can affect you and what to do if it does. By doing so, you could also save someone else’s life. Make sure your travel insurance covers you for the max altitude you will trek to.
Rest assure that our high altitude treks are tried and tested and you may already be asking yourself the question about whether you can pre-acclimatise or train for it?
What are the effects of altitude?
When you ascend to altitude for a sustained period of time, your body undergoes some physiological changes. Feeling fatigued, headaches, breathlessness, vivid dreams, sleeping badly, a loss of appetite (and possible nausea) and a change of bowel movement are all common experiences. These are the common symptoms of Acute Mountain Sickness (AMS). Whilst these symptoms are not life threatening, they should be treated as early warning signs.
If you continue to ascend with the symptoms, there is a real risk that it will progress to either High Altitude Cerebral Oedema (HACE) or High Altitude Pulmonary Oedema (HAPE). Both are considered emergencies and any further delay in treatment could be fatal.
The most effective treatment (and probably quickest) is to descend. Rapid recovery is often experienced by descending just a few hundred metres in altitude.
Stay hydrated, drink lots.
What is AMS?
Acute Mountain Sickness (AMS) is the term given to the early warning signs (symptoms) that are likely to occur to someone who is ascending without having fully acclimatised: in short, ascending too fast. AMS can strike anyone regardless of age, gender, fitness or experience. No-one is immune, not even those that were born and live/work at higher elevations such as the porters who work in the Everest region.
If ignored, it can lead to more serious, often fatal, issues.
Can I pre-acclimatise, or train for altitude?
It is possible (in a fashion) but given that a decent acclimatisation programme should suffice, it is questionable whether the time and money spent is worth it.
You can use a mask or chamber to experience a reduced oxygen level but all it proves is that it is more difficult to breath with less oxygen! What it can’t do (in a single day at least) is to replicate the effects of being at altitude for a number of consecutive days and that is far more important and significant. See more detail about why.
What’s acclimatisation?
Acclimatisation is the process of allowing the body to get accustomed to the thinner air. Everyone can acclimatise although some people take longer than others. The vast majority of people acclimatise well on tried and tested acclimatisation programmes. You won’t know until you do it.
In general, once you get over 3000m, you should adhere to general mountaineering guidelines for safe ascent. Ascend no more than 300m higher than the previous night’s sleeping altitude. You can ascend higher during the day (ie going over a high pass) as long as the net gain is no more than 300m. Every 3rd day, rest (go no higher). The shape of mountain terrain will not allow these guidelines to be met exactly (or sometimes even close), so manage it as best you can.
All of our itineraries that involve high altitude have acclimatisation programmes built into them, often more or ‘spare’ days.
Diamox (Acetazolamide)
Diamox is a well-known drug within the mountaineering/trekking fraternity to aid acclimatisation. It can be prescribed by your GP (be aware some GP’s won’t do this) or Travel Clinic. It can be used to aid prevention or as a cure (but it’s not guaranteed to do so). It does have side effects (intense temporary pins and needles is the prime one) but affects different people in different ways. The Travel Doctor’s webpage is a good source of information to decide if it is for you.
HACE and HAPE
HACE and HAPE are the next stages beyond AMS (if left untreated and you continue to ascend) and both can kill.
HACE (High Altitude Cerebral Oedema). The brain needs a good supply of oxygen and high altitude reduces that supply. If the symptoms of AMS are ignored and you continue to ascend, additional symptoms may appear:
Symptoms – Severe headache, clumsiness, confusion, vomiting and a change of behaviour (mood swings) are classic examples.
If these symptoms are ignored, it could rapidly lead to a loss of consciousness, reduced breathing and death.
HAPE (High Altitude Pulmonary Oedema). As the body adapts to a quicker and deeper style of breathing, changes occur in the blood. Fluid may collect in the lungs as a result, causing HAPE. Symptoms include:
Symptoms – Shortness of breath, fatigued, coughing (with blood in the spit).
If these symptoms are ignored, it could rapidly lead to the breathing stopping and death.
In serious cases, death can follow within a matter of hours. Do not delay … descend, descend, descend.
Essential reading: Travel and High Altitude and Medex – travelling at high altitude.
Trek Itineraries
Our itineraries all have built in tried and tested acclimatisation programmes that will not be broken (shortened). They conform to the internationally recognised guidelines for safe ascent. Some trekking days may appear short when ascending. This is purely to stay within safe ascent guidelines.
Common Sense
Experiences at high altitude vary enormously. It is not an exact science and everyone is different. Guidelines are there to help you avoid putting yourself (and others) in danger. Summit Fever is a strong emotion but remember, the mountain will always be there. You may not if you continue to ascend when your body tells you not to. Common sense should always prevail.
Unbelievably beautiful, wild, and unspoiled.
The arctic environment is beautiful, demanding, extreme, exciting, and a real adventure in wild, remote unspoiled terrain. Our arctic adventures and expeditions are run in northern Norway (Finnmark and Spitsbergen (Svalbard)) and Finland.
As the explorer, Sir Ranulph Fiennes once said ‘there is no bad weather; only inappropriate clothing‘. People fear the arctic simply because of the cold temperatures. Perhaps their real fear is that they would be ill-equipped?
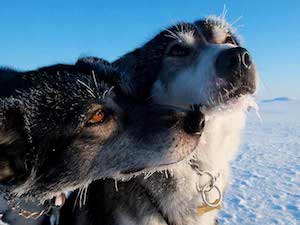
If you have ever thought of heading for the North or South Pole, try our Arctic adventures to see if it’s for you. At 7 days long, they immerse you in this white wild space at a fraction of the cost! One of life’s experiences.
Finland – is our home to snowshoeing, long-distance cross-country skiing, and some mixed activity adventures. They all take place on the east Finnish border and uses wilderness huts for accommodation on a nightly basis.
Terry Crosby (founder of Travel and Trek) is a former Arctic Survival Instructor, trained in Norway.

Nepal Notes
Our focus in Kenya is Mt Kenya (Mt Lanana 4985m), the 2nd highest peak in Africa.

Download the appropriate kit list:
Passport – Your passport should be valid for a minimum period of 6 months from the date of entry into Kenya. Make sure you have two blank pages in your passport on arrival.
Visa – You need a visa to enter Kenya. You can either get a visa on arrival at the airport, or before you travel. You can apply for single entry and transit visas on the Kenya e-visa website. You can also apply for these, and other types of visas, at the Kenya High Commission in London.
You should check the latest up-to-date Entry Requirements for Kenya on the FCDO webpage.
International Flights – We do not include, or sell international flights. We can assist you with advice on the best flights based on our extensive experience of such matters in order to get you to, and from your destination based on your own travel plans. There are flights direct to Nairobi.
When trekking in Kenya, you will need a daysack and a trek holdall. See our article on holdalls and luggage.
Daysack – The recommended capacity is 35 liters. Your daysack will stay with you all of the time on the trek and it will likely have the following in it (weight fully loaded 6 – 7 kg):
- waterproofs, fleece, duvet jacket, hat/gloves
- water, snacks
- sunhat, sunscreen, sunglasses
- personal hygiene (toilet tissue, hand sanitiser)
- camera
- personal first aid kit
Trek Holdall – A holdall is a soft-skinned bag that will carry the remainder of your clothing/equipment, wash kit, and sleeping bag. The Porters do not walk alongside you during the day therefore when planning your packing, bear in mind that once your bag leaves you in the morning, you may not have access to it again until you reach camp at the end of the day.
Travelling to Kenya – Depending on where you are travelling to (and therefore what’s going with you), and how you’re getting there (direct flight or transiting another airport), consider what luggage you use to get your belongings there. The airport baggage handling systems can be rough at times.
Storing Luggage – where possible, you will be able to leave some luggage (safely) behind, so you don’t need to take all of your clothing with you on the trek.
Return airport transfers are included, using a single-timed arrival flight where at all possible. There are well-known security issues in Kenya, please read the FCDO Advice. When travelling with reputable companies, Kenya is a safe place.
Hotel on Arrival. On arrival in Nairobi, we transfer straight to the 3* Boma Inn. It is a large, safe, contemporary establishment with modern facilities. It is ideal for an overnight stay after a long flight prior to onward travel the next morning. This is subject to availability.
On Trek. Good quality 2-man tents capable of withstanding the worse weather a tropical mountain weather environment can throw at them. The first night is spent at the Chogoria Bandas (huts, altitude 3000m).
Post Trek. Soames hotel, Nanyuki. This is a beautiful, ‘garden cottage’ establishment, right on the edge of the Kenyan Plains. It’s perfect for post-trek relaxation with ‘Jack’s Bar’ on hand should you need it!
Single room option costs are stated under the Dates and Prices tab above.
Virtually all meals are supplied from arrival to departure. The itinerary (see Itinerary tab above) will confirm what meals are supplied.
On the trek, a skilled chef will cook your meals. You can expect:
- Breakfasts from, cereals (including porridge), pancakes, toast, eggs, hot drinks.
- Packed lunches including bread, biscuits, pancakes, cake, fresh salad, and a drink.
- Coffee/tea/snack on arrival in camp.
- Evening meals from, soup, potatoes, pasta, rice, vegetables, fruit, hot drinks.
Catering for vegetarians presents no issues.
Most dietary requirements can be catered for if we are aware in advance.
Your drinking water will be taken from local sources and made safe to drink, ie boiling.
Kenya’s currency is the Kenyan Shilling (Ksh) and not available on the currency markets.
The US$ is king here and given the amount of time, and where, you can spend money, it is suggested that you may be better off sticking to the US$ for ease and convenience. The advantages are that you can have the currency in your hands prior to arrival in Kenya (no time wasted exchanging) and you won’t be left with Kenyan currency change you can’t get rid of (wastage). You may get some Kenya currency in change but that’s likely to be limited.
Personal spending. If you are not travelling beyond the extent of a standard itinerary, then a few meals and drinks and the odd souvenir is going to be about the extent of your spending. This does not include staff tips (see below). £250 – £300 should, therefore, be enough but this does depend on your personal spending habits.
We recommend either carrying additional spare cash OR a debit/credit card as a backup. The latter (credit card) should always be carried for emergencies.
Credit Cards are accepted in larger establishments, such as the hotels that you will be staying in. Travel credit cards.
Staff Tips. You should budget approx US$120 for this trip. The tips will be paid to the Guide, in US$ cash. Further information on the procedure for this will be supplied in the Final Details document sent to you 2 weeks prior to departure.
Fitness is very subjective and in simple terms, train for what you are going to do.
You will be walking between 4 – 9 hours per day with summit day being the longest. Distances in mountainous terrain is measured in hours, not miles.
Even though you are close to the Equator, the first night on the mountain (Chogoria Bandas) is close to 3000m and therefore ambient air temperatures are lower than you might expect. Expect around 10°C, lower at night.
Physically, this trek is within the bounds of an average trekker. There’s some trekking and ascending to be done of course but taken steadily, there is no reason why an averagely fit trekker should not make the summit. This does not take into account the altitude, which can have a huge part to play (see separate tab). We spend 2 nights at Lake Ellis (3450m) to consolidate acclimatisation before ascending further up the mountain. We would recommend a good general level of fitness.
In the UK, if you can walk for 5 – 6 hrs per day, on consecutive days, over undulating terrain (with normal rest stops), carrying a daysack weighing approx 6kg, then you should be perfectly capable of completing this trek at least as far as the base for the summit attempt.
For any advice – call 01529 488159 or 07725 943108.
Mt Kenya is a high altitude peak and you are strongly advised to read about what Acute Mountain Sickness (AMS, aka altitude sickness) is, be aware of the effects, the symptoms, and what to do if you succumb. Please read our section on Trekking to High Altitude in the General Notes section above.
If you would rather speak to us for advice, call us on 01529 488159.
Mt Kenya itself lies just 10 miles south of the equator. At the end of the trek, you will cross the equator.
Given its proximity to the equator and the altitude of the mountain, My Kenya has a typical tropical alpine weather system; wet and dry seasons.
- Mid Mar – Jun – heavy rain season (2/3 of annual rainfall)
- Jul – Sep – dry season (wetter of the two dry seasons)
- Oct – Dec – short rainy season (receives approx 1/3 annual rainfall)
- Jan – Feb – dry season, least rainfall
Daylight hours are the same year round; 0530hrs – 1730hrs daily.
Daily weather patterns are also similar; clear early morning, with cloud build up towards midday, clearing later in the day. Temperatures rarely get below zero but will be in single figures at altitude.
Advice for vaccines is constantly developing. Visit your GP and the following UK travel advice website for the most up-to-date advice (including malaria) and information on where you will be travelling to. Don’t forget to include ALL travel if it includes a wider itinerary.
Your Guide(s) will be a local and speak english. He will be First Aid trained and know the area extremely well as will any staff supporting you. They will have all of the necessary equipment and knowledge to get you to professional medical assistance should it be necessary.
Kenya has generally good mobile coverage.
Kenya has a UK style 240v, 50Hz supply. World power and plugs – see what works
Charity Fundraising Options
This section shows the fundraising options for those choosing to raise funds for a charity. The details for this challenge are as described above (itinerary, etc…).
Call 01529 488159, 07725 943108, or use this form to discuss.
Cost: £1550
| Funding Method | Registration Fee | Final Balance | Fundraising Target |
|---|---|---|---|
| Trip Cost - £1550 | |||
| Self Fund | £350 | £1200 | No formal target |
| Flexi Fund | £350 | £400 | £1600 |
| Min Sponsorship | £350 | Paid by charity | £2400 |
– £190. This fee is for sole occupation of a room on nights 1 and 7, and a tent to yourself on nights 3, 4, 5 and 6. Sole occupation is not possible on night 2.
Below is a comprehensive explanation of the fundraising options.
LAND ONLY
We do not offer or sell international flights. We can assist you with advice on the best, most reliable flights for this destination based on our extensive experience in such matters. Our services will commence when we collect you at the destination airport and finish when we drop you back there unless otherwise agreed.
✓ Choose your preferred airline, flight route, seat class, and departure timings/airport to suit you.
✓ Low airfares and deals – you choose when you book your flights.
✓ This trip is a ‘package’, and therefore the Package Travel Regulations 2018 apply.
✓ Financial protection (International Passenger Protection (IPP)) against our insolvency.
All of our holidays can be tailor-made for YOU and we make it simple. It’s so easy to do.
Popular Treks and Cycles

Kilimanjaro, Lemosho

Annapurna Circuit

Ngorongoro Bike Ride, Tanzania

Sahara
Our Reviews
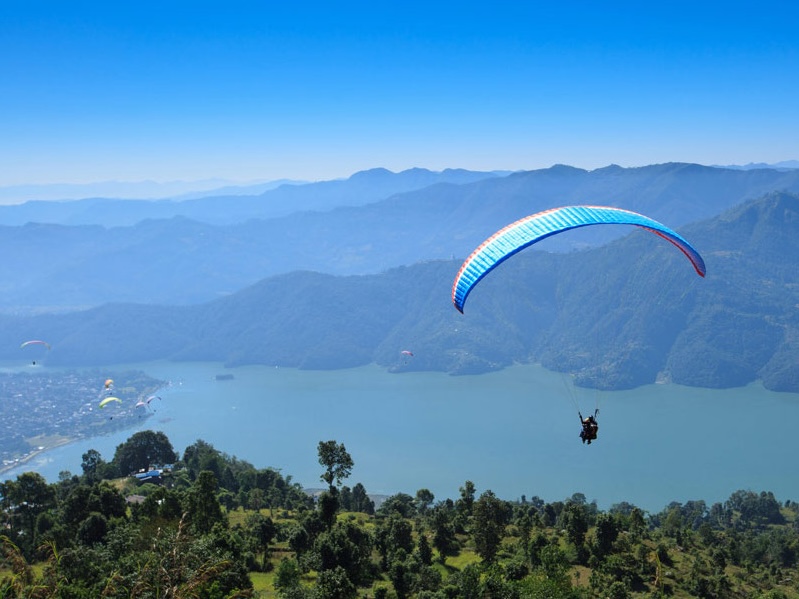
Pokhara – What To Do & See

Everest Base Camp Review

Kilimanjaro vs EBC | Treks Compared | Which is Harder

Is The Maldives Worth It?


